AVR ONE! Arrives
On an awesome-ness scale of Boiled Zucchini all the way to Denise Richards, finally receiving my AVR ONE! package rates about a Lamb Kebab. This afternoon a FedEx man turned up on my front door with a rather large Atmel-branded package in hand, addressed to me! In other news, I discovered it’s really hard to sign your name when you’re excited enough to be jumping up and down.
The package is all thanks to a kind Atmel engineer named Kristian, who liked my XPLAIN work (specifically, my open source PDI programmer for XMEGA chips, part of my AVRISP-MKII clone project) so much he offered me a free AVR ONE! kit, courtesy of Atmel. I’ve received a few nice toys from Atmel in the past for my efforts – including a JTAG-MKII which I use heavily – but this one really takes the cake.
You are forgiven if you don’t know what an AVR ONE! is, since they’re expensive and rarely seen. Picture a large Atmel branded Altoids Mints tin with a Sci-Fi-esque glow, and you’ve pretty much approximated what the real deal looks like. The AVR ONE! (yes, the exclamation mark is part of the official name for this beast) is Atmel’s premiere AVR development system, which can program and debug absolutely any Atmel AVR, from the small 8 bit series to the large 32 bit series. It’s kind of like a souped up JTAG-MKII, in that it connects to standalone boards via a long cable and adapters. The main reason to get an AVR ONE! over a JTAG-MKII (or a Dragon, for that matter) is its very advanced 32-bit AVR debugging capabilities. I’m not a big 32-bit AVR user yet, but if nothing else it will serve as an awesomely fast and robust programmer/debugger.
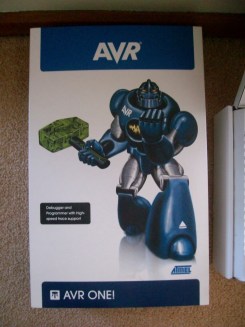
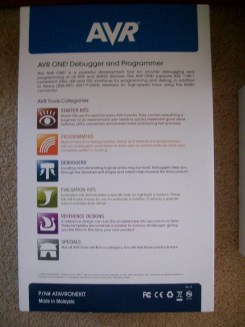
Here’s what the outer box art looks like. Mmm, Thor. I love the new Atmel box designs – my original STK500 was just a plain white and blue box. The new designs are much more inviting.
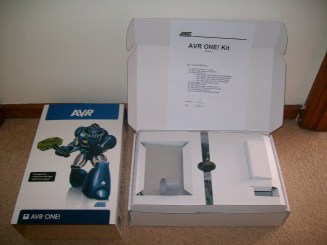
What you can’t see here is the sense of scale – the box is gigantic compared to the actual AVR ONE! device, to make room for all the extras. It was shipped in a “Large” FedEx outer box. Opening it up, I find a nice sheet listing all the contents, plus a date/signature of the person who packed it and checked it. I like this – it shows attention to detail, since it means no shipped boxes with missing parts.
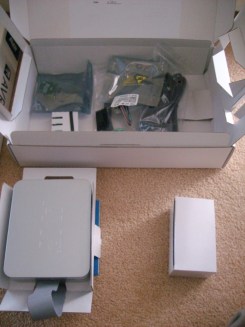
Here’s a slightly closer look at the top layer of the box contents. The gray unit on the left is the actual AVR ONE! unit, and to the right you can see the power adapter (white box) and bottom layer contents. I removed the right insert for this shot, since it just held the power adapter box in place.
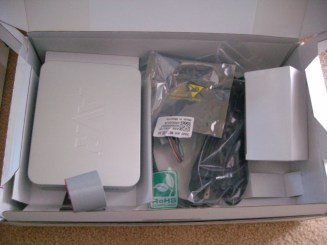
Next, I pulled out the power adapter box and the AVR ONE! unit to inspect it, and so I could get a good look at the other goodies in the box.
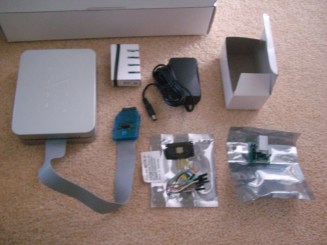
Let’s have a good look at all the bits, shall we? Not shown here is the included USB cable or regional power cords (no Australian, damnit – only European and American). I’ll go over the bits in a minute. This makes a nice change from the cheaper Atmel units, since everything you could possibly need is in the box. The JTAG-MKII lacks a power adapter, and the Dragon doesn’t even come with a USB cable. I got the impression that Atmel has gone all-out to make you feel you’ve really got what you paid for here.
Here’s a list what you get:
- AVR ONE! Unit
- Universal 12V, 1.25A Power Adapter
- USB Cable
- Power Cords for Adapter (European and American to Figure-8)
- JTAG and ISP standoff adapters
- MICTOR-38 Port Header
- Squid Connector Cable
- Self-Test Board
That’s right, they even included a surface mount MICTOR-38 connector – an odd looking thing designed for AVR32 boards, which I believe is an industry standard – for you to mount to your own board. The squid cable converts a standard 2×5 JTAG header into 1×1 coloured female jumpers, so you can connect to boards via ISP/PDI/TPI/JTAG which lack standard headers.
The AVR ONE! unit is metal, with a blue plastic stripe sandwiched in the middle. It’s actually surprisingly heavy, and unfortunately there are no visible screws outside two odd bolts on the back, so I can’t easily open it up to show internal pictures. I’m curious as to what’s actually inside of it – my guess is an FPGA and an AVR (EDIT: Looking in the AVRStudio help file confirms this to be the case). Why a FPGA you ask? When I upgraded it, there are several .bin files for AVR32, XMEGA, ATTINY and ATMEGA programming/debugging, and the upgrade client references a “disk”. Since AVRs cannot switch firmware on the fly (and since it’s too damn fast for some sort of bytecode) that makes me think it’s writing to an internal memory disk, which is then loaded into a FPGA for the actual grunt work.
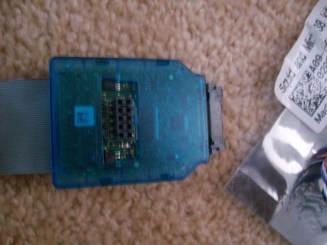
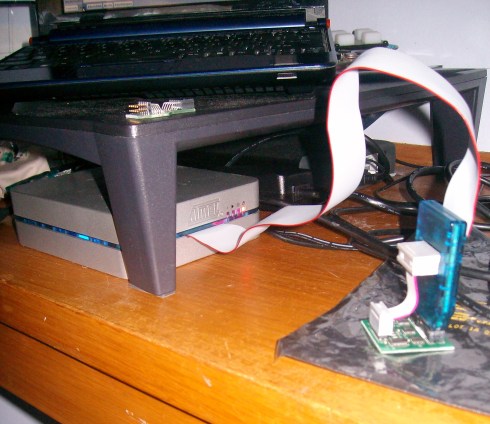
Right, so let’s look at the connector. I already love the AVR ONE! due to its soft mini-IDC cable, instead of the plastic ribbon cable of the JTAG-MKII. The latter is rather fragile, doesn’t lend well to bending, and once it’s broken it’s almost impossible to replace, since no one stocks it. Thankfully mine is still intact, but I can tell its wearing where it meets the target adapter. On the end of the cable is a translucent blue pod filled with more electronics than a Jaycar store, presumably to add level conversion and the like to the signals. The end of the pod has a MICTOR-38 connector for AVR32 boards, while the underside contains a standard 2×5 female header for JTAG and other programming protocols.
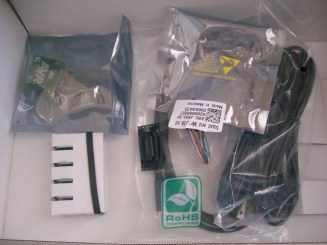
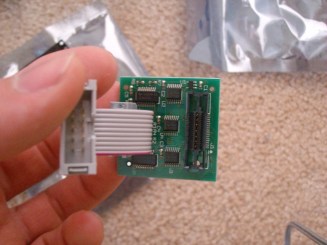
Now, back to the other contents of the box. Here we can see a weird cardboard box held together with a rubber band. What ever could it contain? In one of the static-proof bags, I also found an odd small board with both a MICTOR-38 and JTAG header.
I’ll go over the board first. I was a bit confused at first (not being one to read the documentation before digging) – the board had *both* MICTOR-38 and JTAG headers, plus a small JTAG cable that was only a few centimeters long. The underside marked the board as a “Test Board”, which made me assume at first that it was a demo board for showing off the AVR ONE!’s capabilities. In actual fact, this is part of the system’s self-test functionality, which can be used from within AVRStudio to verify that the unit is working correctly once it is attached. This prevents the old “is my code broken, my board broken or my development tools broken?” question which can plague users of Atmel’s other offerings, like the thread on AVRFreaks recently when one of the buffer chips of John’s JTAG-MKII broke without his knowledge.
The way this works is you plug both connectors into the AVR ONE!’s pod at the same time, then choose the “Self Test” option from the Tools menu. This runs a short set of checks via the test board, and returns a pass/fail result – plus error codes to send off to Atmel in the case of a failure so they can help figure out your problem remotely. I was a bit panicked at first since my unit spat out lots of errors, until I realized that the MICTOR-38 port had to be attached at the same time as the JTAG — this is the reason for the small JTAG extension cable, so that it can reach the JTAG port while the MICTOR-38 port is also attached.
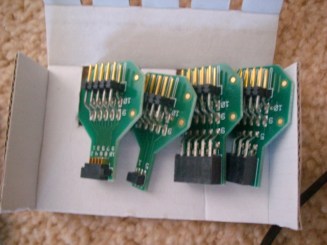
Finally, let’s go back to the mystery box. Inside is a set of four adapters, which can be inserted into the AVR ONE!’s JTAG connector on the pod. One is essentially just a non-flexible JTAG extension cable to move the pod away from the target board (otherwise it tends to get in the way) while another adapts it to the half-pitch JTAG connectors used on the Atmel Raven kits. The remaining two are ISP adapters of standard and half-pitch size – no more ^%$ing squid connector for ISP programming!
This is the point where I connected it all up, and started AVRStudio. Unlike the JTAG-MKII, the power adapter is required for it to work – with the older kit, you could ignore the power adapter requirements if you connected it via USB into a bus host which could provide sufficient current. Not so with the amount of hardware being driven in the AVR ONE!, so I’ve now got another power cord on my desk.
Unfortunately, this is where I got frustrated – the drivers wouldn’t install no matter what I tried. After a bit of searching online, I found a post (on AVRFreaks, no less) indicating that I had to uninstall and reinstall my AVRStudio4 installation with the AVR ONE! attached for the correct drivers to be installed. This I did and suddenly all was hunky-dory, even on my 64-bit Windows 7 installation.
So far I’ve only played with it for a few minutes with my USBKEY to check that it works, so I can’t give too much information about how good it is in practice just yet. All signs point to it being fantastic however, as I can already see AVRStudio responding faster to it than it did with my JTAG-MKII.
Thanks Atmel!



I know what an AVR ONE! is but I had to google what a “Denise Richards” was… Is that geeky?
By the way, the “Let’s have a good look at all the bits, shall we?” paragraph is repeated 😉
Whoops! All fixed – I copy-pasted accidentally, thanks Angus. I now brand you a heathen for not being a member of the Church of Denise Richards (circa “Starship Troopers”) ;).
– Dean
Interesting adventure!
I like companies like Atmel that support promising projects and engineers 🙂
Dean could you post a pic of the Jtag adapter plugged into the avr one pod so one can see how this will all look when used? Thanks
Sure, will do when I get home tonight.
– Dean
Oh, I do not get such tools on my door 🙁 — I must make my owns If I need…
[…] be surprised to find my JTAG-MKII back on my desk, after it was well and truly shafted once my AVR ONE! arrived a few weeks ago. However, I’ve since become rather irritated by the constant wackiness […]
Hiya, nice post! I actually just purchased the stand off adapters for use on the AVR Raven. I’m new to this kind of work, though, and I thought the stand off adapters would be male, not female. Can you recommend the proper way to connect the mkII to a stand off adapter and finally to the AVR Raven?
Thank you,
D
The Raven kits should come with a standoff adapter and male small-pitch headers to solder to the board – did you buy your kit new? The standoff adapters are standard pitch JTAG male to small pitch JTAG female. This is correct for the Atmel AVR ONE! and JTAG MKII.
– Dean
Hi!
I got an AVR ONE! but i can’t program/debug/trace any UC3 targets when its connected using the MICTOR-38. When i use the classic JTAG it works fine. I have also done self-test and it doesn’t show any errors.
I can’t find what is going on, any ideas?
Nikos,
I haven’t used any MICTOR-38 connected targets except for my UC3B evaluation kit, which worked fine. Are you using a pre-made kit, or have you wired up a board yourself?
– Dean